Self-Host FlowInquiry with a Single Command – Fast, Easy Setup
🚀 Self-Host FlowInquiry with a Single Command
FlowInquiry is an open-source project management and ticketing platform designed for internal and external collaboration. With powerful features like SLA tracking, Kanban boards, workflow automation, and AI-driven insights, it’s a smart alternative to Jira, Zendesk, or Freshdesk.
If you’re looking to host FlowInquiry on your own server or local machine, the good news is: you can spin up everything with a single command.
🧰 Requirements
Before you begin, make sure you have:
-
Docker installed
-
Docker Compose installed
-
bash shell (Linux/macOS or WSL for Windows)
🛠️ Installation Steps
-
Open your terminal.
-
Run the following command:
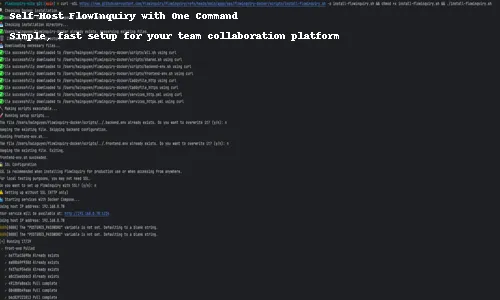
curl -sSL https://raw.githubusercontent.com/flowinquiry/flowinquiry/refs/heads/main/apps/ops/flowinquiry-docker/scripts/install-flowinquiry.sh -o install-flowinquiry.sh && chmod +x install-flowinquiry.sh && ./install-flowinquiry.sh
This script does the following:
- Generates secure environment variables
- Downloads all necessary Docker images (backend, frontend, PostgreSQL, Caddy)
- Sets up volumes for persistent storage
- Starts all services using Docker Compose
- Prompts you for minimal configuration (SSL, domain)
ℹ️ Pro Tip: If you’re just testing locally, you can skip the SSL setup during installation.
🧪 Testing the Installation
After the script completes, open your browser and go to http://<LAN_IP>:1234 or the domain you provided during setup. Find your LAN IP address in the installation logs. Look for a message like:
Using host IP address: 192.168.0.78
You should see the FlowInquiry login screen. From there, you can:
-
Configure settings like email, teams, and workflows
-
Start managing your projects and requests
💬 Need Help?
If you encounter issues or want to contribute, visit our GitHub Discussions or open a new issue.
Table of Contents
Related Articles

The Open-Source Advantage: Why Transparency Builds Better Teams
In open source, transparency isn’t a risk — it’s a strength. By sharing ideas, code, and processes, teams move faster, collaborate deeper, and build products that truly last.

🚀 FlowInquiry v1.0 is Officially Released!
FlowInquiry v1.0 is officially live! 🎉 This release marks a major milestone in workflow automation, bringing enhanced team collaboration, customizable workflows, and seamless integrations. Whether you're managing customer requests or streamlining internal processes, FlowInquiry empowers teams to work smarter and faster. Dive into the latest features and improvements that make this the most powerful version yet! 🚀

FlowInquiry v1.2.3 – Focused on Quality, Backed by 70%+ Test Coverage
v1.2.3 isn’t a flashy release—but it’s a meaningful one. We focused on code quality, upgraded core tools, and pushed test coverage beyond 70%. The result? A stronger foundation for everything that comes next.